
How to Set Up a Safe, Organized Charging Station
A charging station gives your phones, tablets, headphones, watches, and other devices a dedicated place to recharge. Instead of searching for open outlets or dealing with tangled cables, you can keep everything together and ready to use.
The best charging station is convenient, safe, and easy to maintain. It does not need to be expensive or complicated. With the right location, a few basic supplies, and a simple organization plan, you can create one that fits your space and daily routine.
Choose the Right Location
Start by choosing a spot where people naturally use or store their devices. Common locations include:
– A hallway table near the entrance
– A kitchen counter or cabinet
– A home office desk
– A nightstand
– A shelf in a living room
– A table near a family seating area
The area should be close to a wall outlet and large enough for the devices you plan to charge. Avoid placing the station where it can easily be bumped, covered, or exposed to water.
A charging station near the entryway can be useful for phones and wireless earbuds. A bedroom station may work better for watches, tablets, and overnight charging. If several people share the same space, choose a central location and label each charging area.
Keep Accessibility in Mind
Make sure the station is easy to reach without stretching cords across walkways. Devices should be simple to place on the station and remove when fully charged.
If children or pets could reach the area, consider using a higher shelf or a secured storage box. Keep loose cables out of reach and avoid placing small accessories where they could be mistaken for toys.
Gather the Necessary Supplies
You can build a charging station with items you already have, or purchase a few organizers designed for the purpose. Useful supplies include:
– A power strip with enough outlets
– Device charging adapters
– Charging cables in suitable lengths
– A cable box or cable organizer
– A tray, basket, shelf, or charging dock
– Cable clips or hook-and-loop ties
– Labels or small tags
– A surge-protected power strip, if appropriate for your setup
The number of outlets and cables you need depends on how many devices will use the station. Count your regular devices first, then leave one or two extra spaces for guests or future additions.
Avoid buying very cheap adapters or damaged cables. Choose accessories from reputable manufacturers and use products that are designed for your devices.
Plan the Layout
Before connecting anything, arrange the station on a table or shelf. Place the power strip where it will not slide around, and leave enough room for each device.
A simple layout may include:
- The power strip at the back of the station
- Charging adapters grouped together
- Cables routed toward the front
- Devices placed in separate slots or sections
- Small accessories stored in a tray or container
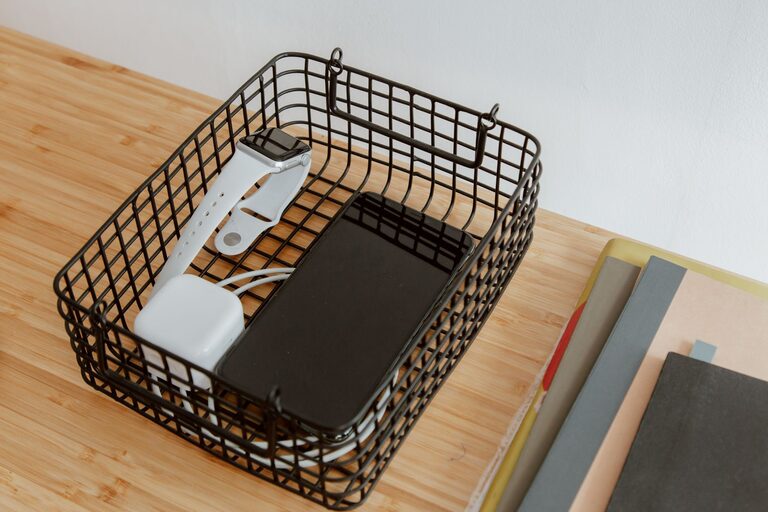
A stand with several upright slots can save space and make it easier to see which devices are charging. A shallow basket can work well for a less formal setup. For a desk, adhesive cable clips can keep each cable near the edge and prevent it from falling behind the furniture.
Try to avoid placing every cable in one large pile. Separating cables by device type makes the station easier to use and reduces tangles.
Organize the Cables
Cable management is one of the most important parts of a charging station. Start by sorting cables according to the devices they serve. You can use different colors, labels, or cable ties to tell them apart.
Helpful cable organization methods include:
– Labeling both ends of each cable
– Using short cables to reduce extra length
– Securing cables with reusable ties
– Routing cables through holes in a desk or organizer
– Keeping spare cables in a separate container
– Using clips to hold connectors in place
Do not wrap cables tightly around adapters or bend them sharply near the connector. Repeated bending can damage the cable over time. Leave a little slack so the connector can reach the device without pulling.
If a cable becomes frayed, cracked, unusually hot, or difficult to connect, replace it. Damaged cables should not remain in regular use.
Connect the Power Safely
Place the power strip on a stable, dry surface with enough space around it for air to move. Do not cover it with clothing, paper, blankets, or other items that could trap heat.
Plug charging adapters directly into the power strip whenever possible. Avoid connecting several power strips together. Also, do not overload a single outlet with too many high-power devices.
Check the instructions for your power strip and adapters. Some charging stations may include several large devices, such as laptops or game systems, which can use more power than small devices. If you are unsure whether a setup is suitable for one outlet, ask a qualified electrician for guidance.
Keep cords away from sinks, hot surfaces, heaters, and areas where they could be stepped on. A charging station should be convenient, but safety should come first.
Add Device-Specific Sections
Different devices may need different amounts of space and different cable types. Create sections for the devices used most often.
For example:
Phones and Tablets
Use upright slots or a stand so screens are visible and devices do not rest directly on the table. This arrangement also makes it easier to check notifications or remove a device quickly.
Smartwatches and Earbuds
Small devices can disappear in a large basket. Use a small tray or dedicated section for watches, earbuds, and their charging cases.
Laptops
Laptops usually need more room and may require a larger adapter. Place the adapter on a ventilated surface and avoid stacking it under other items.
Cameras and Other Accessories
Keep camera batteries, handheld game controllers, and other removable accessories in labeled sections. This prevents small items from becoming mixed together.
Label the Station
Labels are especially helpful in shared homes or offices. Mark each cable or charging slot with the device name or user’s name. Simple labels such as “phone,” “tablet,” or “headphones” are usually enough.
You can also use colored ties to assign one color to each person. This makes it easier to return devices and cables to the correct place.
If your station includes spare cables, adapters, or batteries, label the storage container so those items do not get confused with cables currently in use.
Create a Simple Charging Routine
A charging station works best when everyone follows the same routine. Place devices on the station when they are not being used, and return cables to their clips after unplugging them.
For a shared station, establish a few basic rules:
– Keep the area clear of food and drinks
– Return cables after use
– Remove fully charged devices when practical
– Do not use damaged accessories
– Keep personal items in labeled sections
– Store spare cables separately
You do not need to charge every device at the same time. Charging only what is needed can reduce clutter and leave outlets available.
Maintain the Charging Station
Inspect the station regularly. Look for dust, loose connections, damaged cables, and adapters that become unusually warm. Unplug the power strip before cleaning the area, and use a dry cloth to remove dust.
Every few months, remove cables that are no longer needed. Test labels and replace any that have fallen off. Reorganize the station as your devices change.
A well-maintained charging station should remain easy to use. If it becomes crowded or confusing, simplify it by removing unused accessories and creating better sections.
Final Thoughts
Setting up a charging station is a small project that can make everyday device use much easier. Choose a convenient location, use reliable accessories, organize cables carefully, and leave enough room for safe airflow.
The most effective setup is one that matches your household’s needs. Whether you use a simple tray or a dedicated charging cabinet, a consistent system helps keep devices powered, cables under control, and your space more organized.
